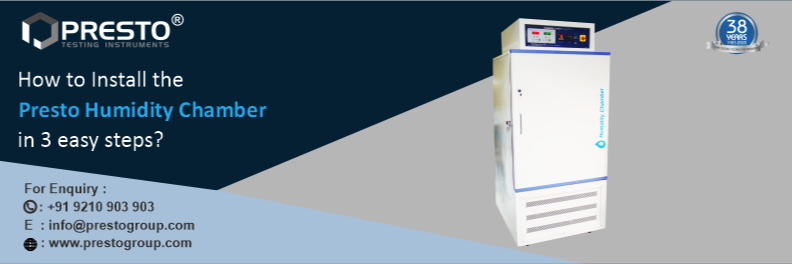
How to Install the Presto Humidity Chamber in 3 Easy Steps?
There are certain products that are needed to be tested in high temperatures so as to assure their quality. Thus, we at Presto have come up with one of the amazing lab testing instruments known as the Presto humidity chamber which has been designed with the latest technology to easily evaluate the product quality at high temperatures. This high-quality lab testing instrument has been provided with digital controls that can provide you with relative humidity as well as temperature control. The testing environment will be conditioned at a targeted dew point temperature and then reheated to a specified air temperature. You can easily assess the physical characteristics, product textures, and influence of ambient conditions of the product by performing condensation humidity testing.
The humidity chamber testing instrument can be used in a variety of industries. It's utilized in the pharmaceutical, plastics, and rubber industries for quality assurance testing. We'll look at how the Presto humidity chamber can help you test the physical properties of your materials when exposed to high temperatures. We will also discuss how you can easily install this lab testing equipment in 3 easy steps.
In order to install it accurately, you can follow these steps:
- Set up this chamber on a plane surface.
- Remove any delicate electronic equipment nearby.
- Place the chamber with minimum clearance from the wall.
Let’s get brief information about these steps below. But before that, we will discuss the top things that you can remember while selecting this humidity conditioning chamber.
Easily evaluate the physical properties of materials with Presto humidity chamber
Temperature and humidity testing are used to determine component behavior in a variety of testing conditions and environments, such as changing environments, high temperatures, and altering relative humidity. This test can be done in a static environment with constant temperature and humidity, or in a dynamic environment with moisture being used to break down components or materials.
The Presto conditioning chamber will help you to maintain the particular temperature and humidity level and plays a crucial role in testing both the physical and chemical characteristics of the material. You can easily test the coating behavior against fluctuating relative humidity with the help of this humidity testing chamber.
Whenever you are going to select the humidity/conditioning chamber then you can easily test the impact of temperature changes and dampness conditions on the product.
Whenever you are going to select this conditioning chamber then you need to keep several factors in mind:
- Humidity ranges
- Products to be tested in the humidity chamber
- Humidity range it has been providing
- Cooling method
- Internal dimensions and technical specifications of this chamber
You can read about these tips for selecting the right humidity chamber and choosing the best possible testing chamber for your industrial purposes. Now, let’s focus on the features and technical specifications of the humidity chamber.
Features of Presto humidity chamber
The humidity/conditioning chamber maintains a certain temperature and humidity level for testing samples. Environmental factors have a significant impact on the physical and chemical characteristics of materials. After the procedure is completed, a conditioning chamber is utilized for textile/fabric materials. The major goal of this chamber is to eliminate the moisture level in the sample. Below we have listed the features of this lab testing instrument.
- Temperature controls through PT-100 sensor
- Alarm system with buzz sound at test’s end-process
- Highly accurate test results under uniform temperatures and humidity levels in the chamber
- Digital Control for Humidity and Temperature
- High Grade imported Glass Wool insulation
- Maximum Thermal Efficiency by insulation means.
- SSR-based heaters
- Digital Preset timer with LED Display
- Inbuilt Auto tuning function
- Water Level Indicator
- Equipped with a rapid air circulation fan for uniform and homogenous heating, cooling, humidity, dehumidify inside the chamber
- Inbuilt Calibration features with reference to master PID controller
- Setting to RTD PT-100 sensor through advanced PID controller
- Auto-stop feature to stop the machine at a set time
- Time totalizer to calculate the no. of Hours run by the instrument
Technical Specifications of Presto humidity chamber
- Hour Totalizer: Records total cumulative no. of hrs. the instrument will run.
- Shelves: 2 no. SS Shelves
- Timer: 999 min (Changeable to Hrs).
- Temperature range: 15 to 60 degrees Celsius
- Humidity Chamber: Ambient to 95%RH
- Temperature sensor: PT-100
- Accuracy: ± 2ºC
- Display: LED (Digital)
- Capacity: 150 Liters
- Inner Side: Stainless Steel
- Outside: – Mild Steel duly Powder coated
- Viewing: Viewing glass incorporated into a visual examination of a sample
- Standards: D1776M – 15, BS 950 Part 1 (D 65)
With these features and technical specifications, it will be easy for you to conduct the test using this testing instrument. This humidity/conditioning chamber will help you to treat the challenges in the coating industry.
Now, let us discuss some easy-to-follow steps for the installation of this lab testing instrument.
3 easy steps for the installation of a humidity chamber
As we have already given you the excerpt for the installation of the humidity chamber, then you got the idea about those three easy steps. Now, we have discussed brief information about how you can easily install this lab testing instrument.
- Set up the climatic chamber on a plane surface, free from vibration at a well-ventilated, dry location, and align it using a spirit level. The site of installation must be capable of supporting the unit’s weight. Care should be taken to ensure proper ventilation around the chamber or the user may place it near an exhaust fan or window.
- A minimum clearance of 1.2 m from the wall is required as well as in front for easy opening of the door.
- Remove any delicate electronic equipment, gauges, etc. from around the Chamber, which may be affected by humidity.
With these three easy-to-follow steps, you can easily install the humidity chamber with ease. You can also read about how you can easily maintain this humidity chamber without putting much effort. You can also give us a call at +91 9210903903 or email us at info@prestogroup.com. We will surely assist you with your queries.
Recent News
- Paper & Packaging Testing Instruments
- Paint, Plating & Coating Testing Instruments
- Plastic & Polymer Testing Instruments
- Environmental Testing Chambers
- PET & Preform Testing Instruments
- Color Measuring Testing Instruments
- View Entire Range Instruments

Catalogue 2023
Get information about new product launches, research, innovation and endeavors at Presto.
download Free CopyNeed more information
Connect with us for your business enquiries. Generally we respond within one or two working days.
send enquiriesContact Us
Quick quote